Cut the Clutter: 5 Steps for Cleaning Up Your Mac’s Storage
Reading time: ~ 3 minutes
Are you tired of seeing the dreaded "Your disk is almost full" notification on your Mac? Do you feel like your once-speedy machine has lost its pep and become sluggish under the weight of cluttered files and unnecessary data? Recently, one of our team members, Ruby on Rails developer, William Mena, realized that his machine was bogged down with a plethora of files, from redundant downloads to oversized media and forgotten development logs.
He went through a thorough cleanup process and documented some practical and effective strategies for reclaiming your storage space and keeping your machine running at its best.
1. Where to Begin?

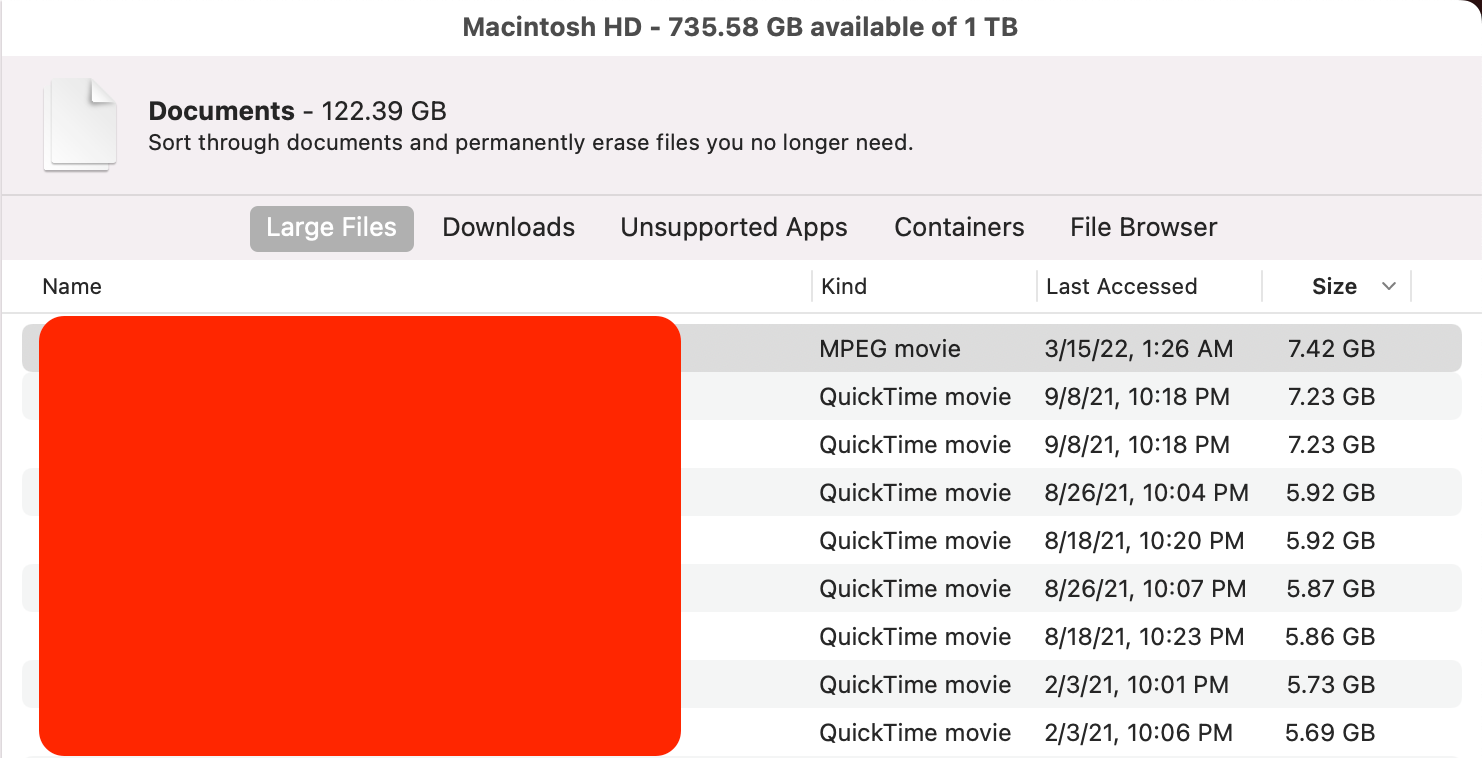
A good place to start is by using the storage management tool on your Mac. This section should look different depending on the version of OSX you’re using, but the contents should be similar. A simple view of how your storage has generally been used up, and a recommendations section where you can view things like ‘Large files’ or your downloads section sorted by ‘Last Accessed.’ Sift through these files and start removing things you don’t need anymore. I had some .dmg files that I used to download software like Slack or Spotify.
2. Clean Up /tmp Folders
The above is pretty good at catching regular files. However, as developers, we need to consider a few more things and look a little deeper- like cleaning up our /tmp folders, log files, and some databases we no longer need.
Our CEO, Robby Russell, runs a script periodically to clean out the development.log and test.logfiles, which can get pretty big after some time. Feel free to use it! 📜
🧹 Planet Argon - Tidy up your Rails Development/Test.log Files and Brew Cleanup
3. Look Through Your Project Files
OSX typically shows you the size of specific folders, but I noticed with our development repositories, they typically just show --.

To determine the size of your directories, run the following commands, replacing the path in the command with the path to your work files.
⚠️Warning: This can take several minutes when working with large amounts of data.
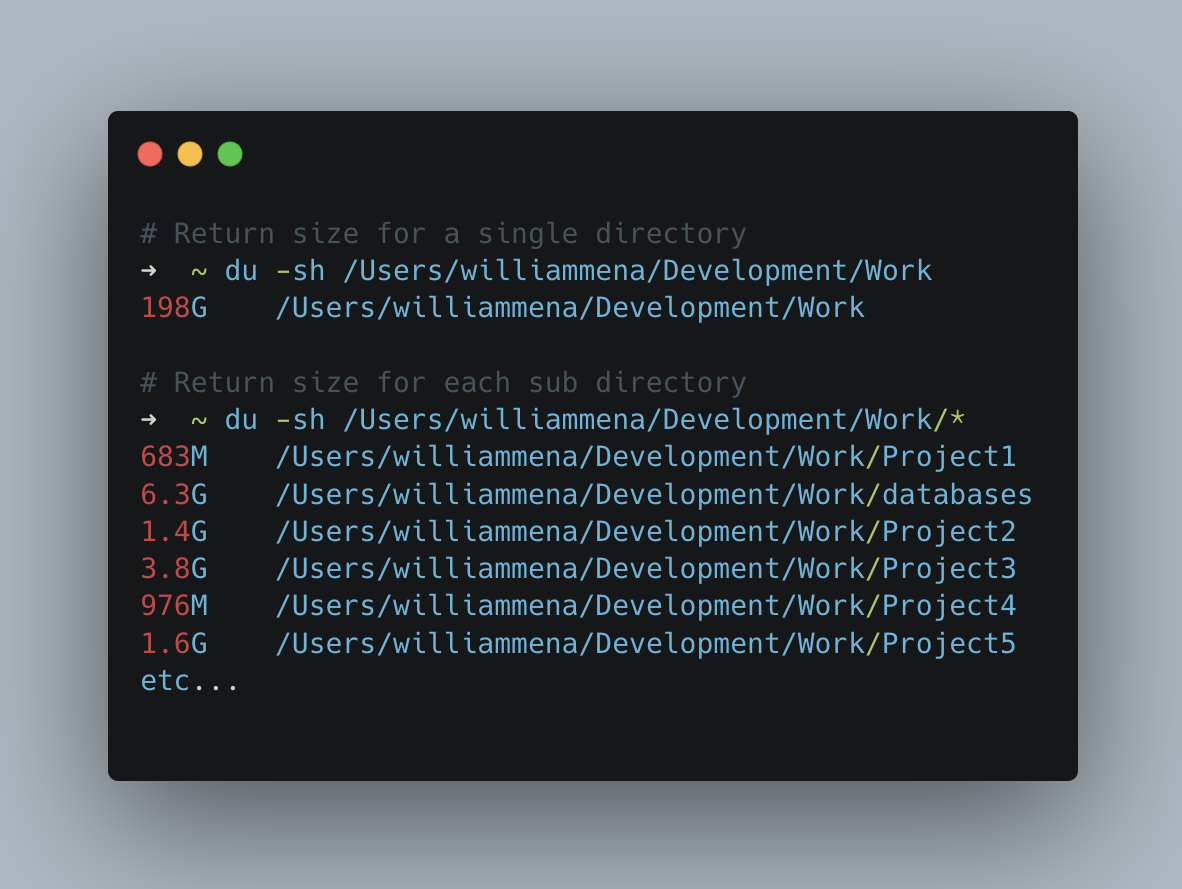
I would investigate any directories larger than a few GB. You can either navigate the project through the finder or use du -sh /Users/williammena/Development/Work/ProjectName/* to see where the larger files may be stored.
Due to these commands, I noticed that one of our projects had 180 GB of unneeded encrypted data in its /tmp folder.
4. Delete Unneeded Databases
⚠️⚠️We will delete actual data past this point, so ensure you have working backups if necessary.⚠️⚠️
psql
Log into psql and enter the command below to view all your databases and their sizes.
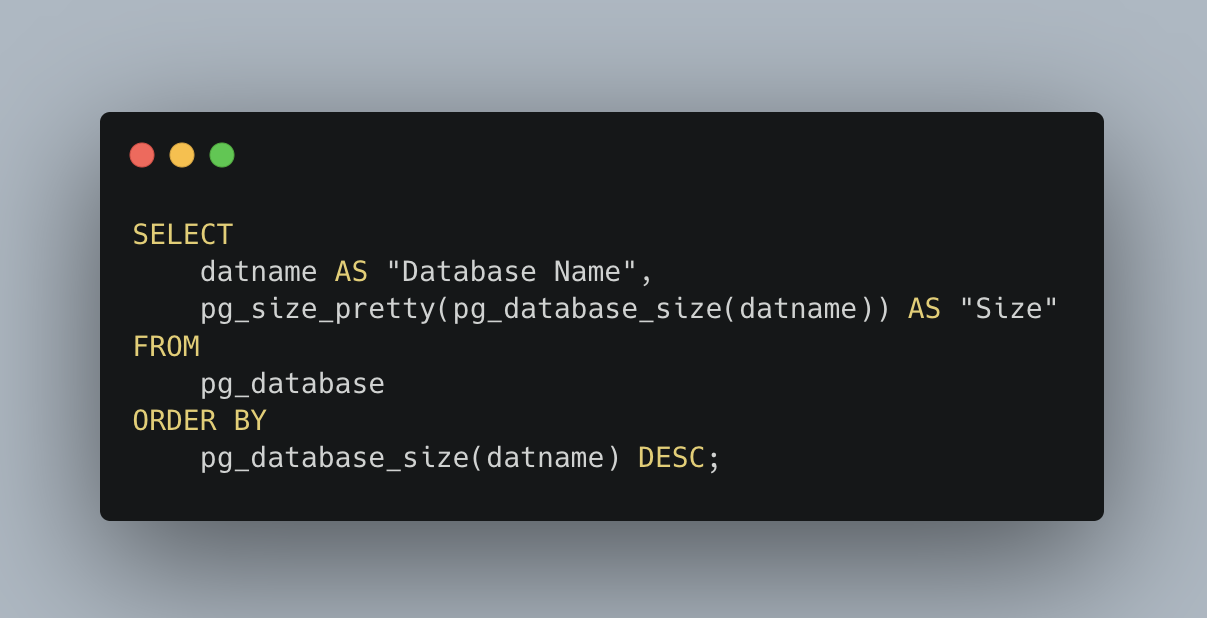
Remove any databases you don’t need, like for clients you’re no longer servicing.
A client of ours also has a setup where you need to create a new database for every new branch you work on, so as you can imagine, you may end up with 70+ databases for the development and/or test environment.
Run DROP DATABASE -database_name- on the database you want to remove.
MySQL
Run the command below to view a list of all your databases and their sizes.
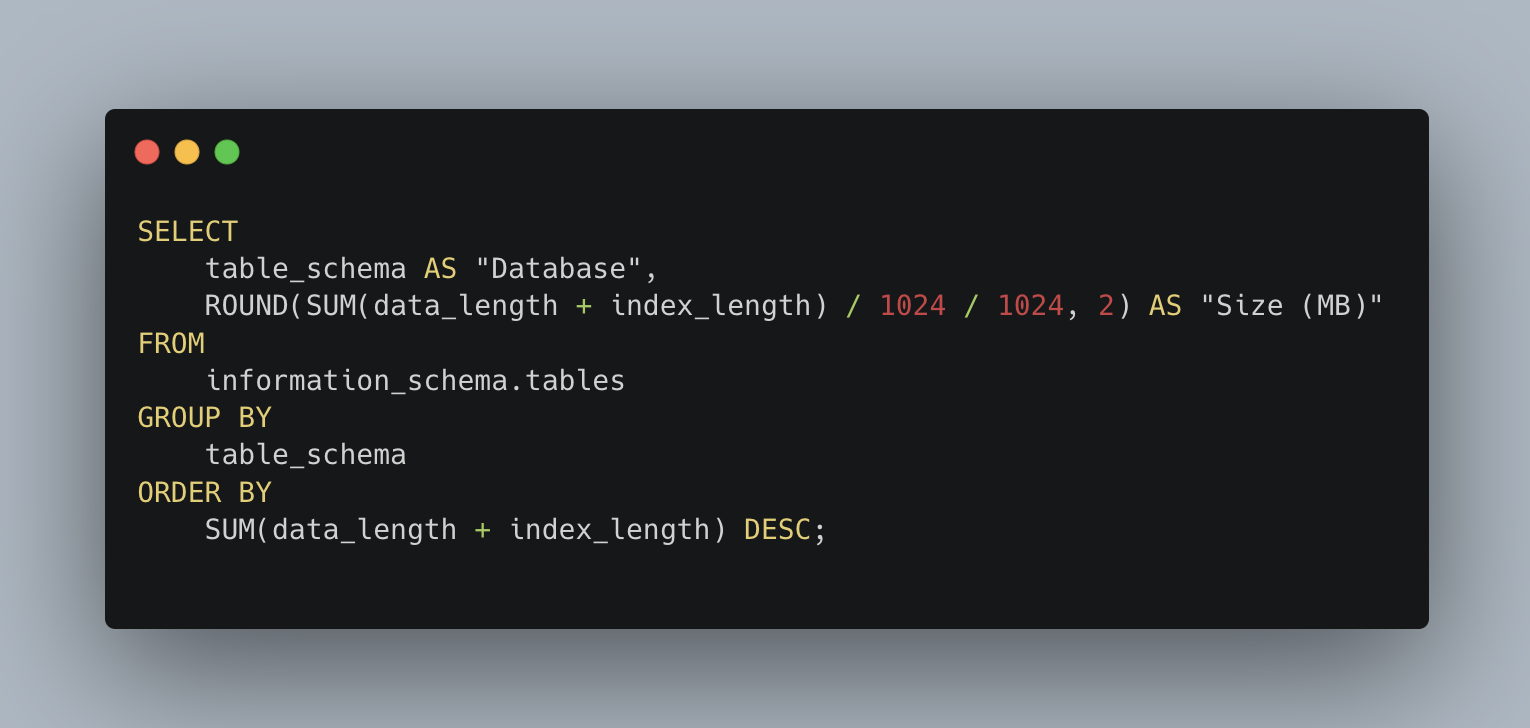
Remove any databases that you no longer need.
5. Clean Up Docker Containers
I recommend going down this path once you’re sure you don’t need any of the containers available, including the data within them. So, make sure you have a database backup handy if necessary.
Read through this for a more detailed explanation of cleaning up containers, images, or other individual objects:Prune Unused Docker Objects
I have also noticed that clearing unneeded Docker objects may sometimes break some of the applications that I need to work. Because of that, I typically start fresh with those applications, completely removing Docker and its associated data and then rebuilding. I’ll mention my process for starting fresh below.
I use these commands:
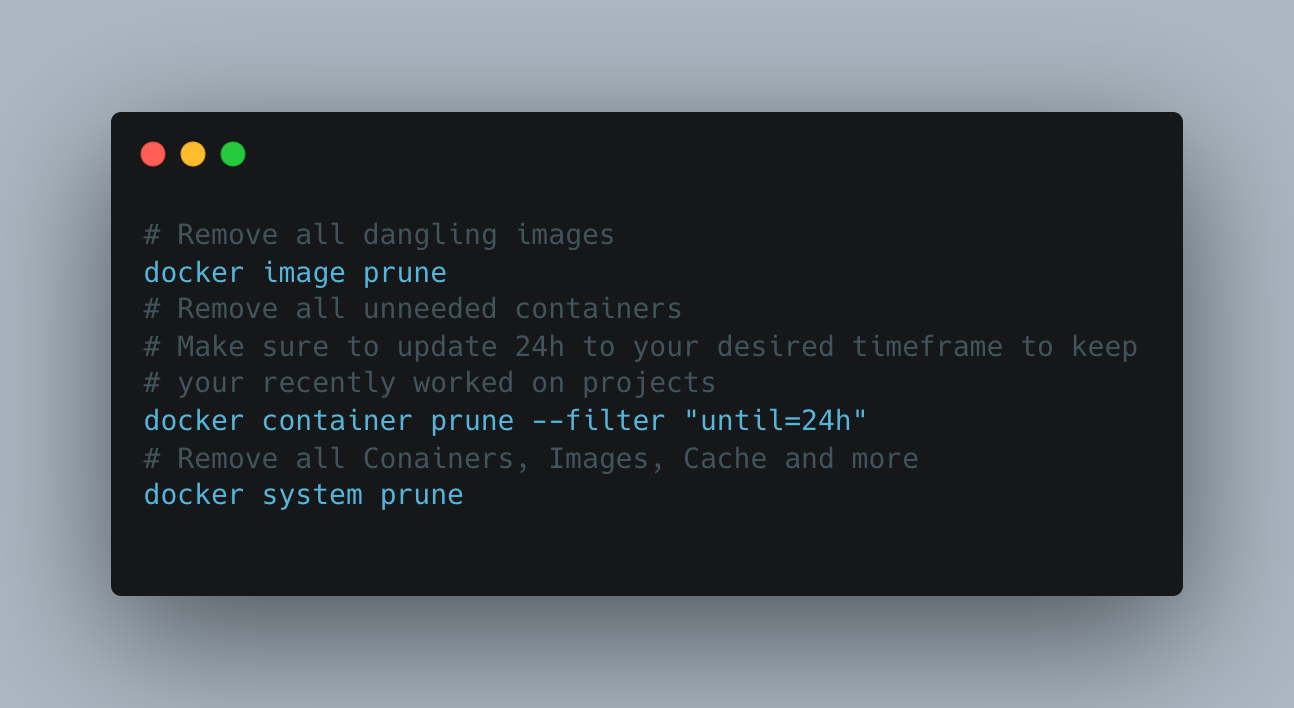
If you need to start fresh with Docker, here are some simple steps:
- Download and install AppCleaner.
- Run
docker system prune. - Make sure to stop and close Docker completely so it can be selectable from within AppCleaner.
- Find Docker within AppCleaner and remove all the files.
- Then, re-install Docker and build the appropriate projects.
Reclaiming storage space on your Mac doesn't have to be daunting. By following these practical steps, you can quickly identify and remove the files and data that are weighing down your system.
If you’d like to learn more about maintainable software practices, enroll in the FREE Maintainable Rails Email Course.