Get Your Photo on Google Results with Google Authorship
Reading time: ~ 3 minutes
I know you have seen it. You are searching for a hack to make IE behave itself and you come across search results with someone’s smiling mug right there next to the link. If you are like me, you are more likely to click these results instead of the boring, all-text results. Something about seeing the author’s face right next to their link inspires an added air of credibility and expertise. Pretty good deal for those people.
So, now you are thinking, how can I get my photo up on my Google search results? Well, let me explain.
Overall, it is pretty easy to setup. This whole system is called Google Authorship. There are a few things you need to get started.
Make Something
First of all, you need content. How can someone find you without some content? This will most likely be your personal or company blog site. However, it could also be a site you contribute to.
Get Profiled
Next, you need a Google Plus profile. This is very easy to set up. Even if you don’t normally use G+, you need to set up a profile for this to work. Make sure you have a nice, friendly profile image so you don’t scare away potential readers.
Now, in your Google Plus profile, make sure you verify your email address. For this, I entered in my work email under my work contact information. Google wants to make sure you are a person.

If your email address domain matches the domain of your site, you may be able to stop here. Google should be able to cross-reference your G+ profile with the posts on your site as long as you have a clear byline with the same name as what you have on your G+ profile. However, this is a shot in the dark and Google may never pick up on the connection. Let’s give them some more information to help the process along.
Contributor To..
Next, we are going to tell Google what websites we contribute to. This will help it determine where to show our image. You can do this by entering the sites in the ‘Contributor To’ section on your G+ profile. This is especially helpful if the site you are linking to is not on the same domain as your email address.
Test Your Progress
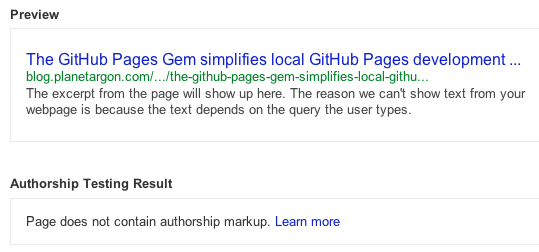
Google offers a handy little test page to see if you have all your information entered in correctly. Visit the Structured Data Testing Tool and enter in a link to one of your blog posts. If you have completed all the steps so far, you might see something like this..

Google doesn’t automatically see the connection. That doesn’t mean things aren’t set up correctly. If you plug in your G+ profile in the next field down, you will probably see a more positive result. If so, you can stop now and wait for Google to pick up on the connection. I have heard it could take weeks, or even months. I’m a little impatient so I went one step further.
rel=author
To give Google a more literal connection between your content and your profile, you can use the rel=author tag. This tag gives Google a more direct connection between you and your content. This can take the shape of a link from your blog post to your G+ profile that contains the rel=author tag. Or, if you want the link to your G+ profile to appear on your website’s about page, you can link from your blog post to your about page with the rel=author tag. Then from your about page you can link to your G+ profile with a rel=me tag.
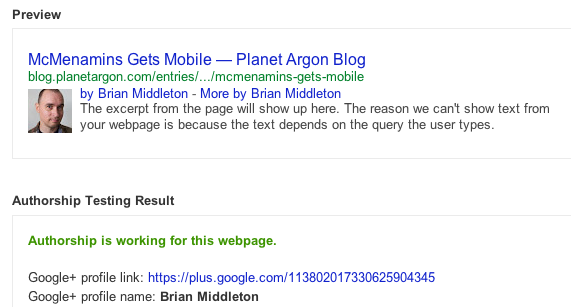
After you have implemented the rel=author tag and you run your blog post link through the Structured Data Testing Tool, you should see something like this..

The way I implemented authorship was to use the rel=author tag on the link back to my profile page on planetargon.com. From there, I linked to my G+ profile with the rel=me tag. This seems to have done the trick. Some of my search results are already showing my photo. However, some of them still only show text results.

As you can see, it is pretty easy to get this all set up. Once it is setup, all you have to do is wait for Google to work its magic. Hope you are not waiting too long.