Why Dry: An Introduction to dry-rb and Why You Should Use It
Reading time: ~ 3 minutes

It’s hard to underestimate the value of good initial architecture in an application. Finding a good place for business and application logic is the most important issue for developers in the initial stages of a project’s life. Sustainable architecture helps keep applications maintainable in a long term perspective, avoiding expensive refactors.
There are a lot of ways to locate business logic in Rails applications. All approaches are great, but some of them work better for short-run projects, some for long-lasting applications. Let’s imagine that we all work on "spherical projects in vacuum" with unlimited budgets and no deadlines.

The Problem
According to the MVC pattern, business logic belongs in models. Also, platform best practices teach us that we should have “skinny controllers and fat models”. It works pretty well for small projects, but as they grow, models can become enormous. You might have seen projects with models thousands of lines long. It’s hard to test and extend models like that, you can easily break something without even noticing. Also, your application cannot be compliant with SOLID, and especially with the Single Responsibility Principle, if you keep everything in models.
There is one more common problem with lots of Rails applications. You can find business logic spread evenly between controllers and models. It’s pretty hard to follow the DRY principle in a situation like that.
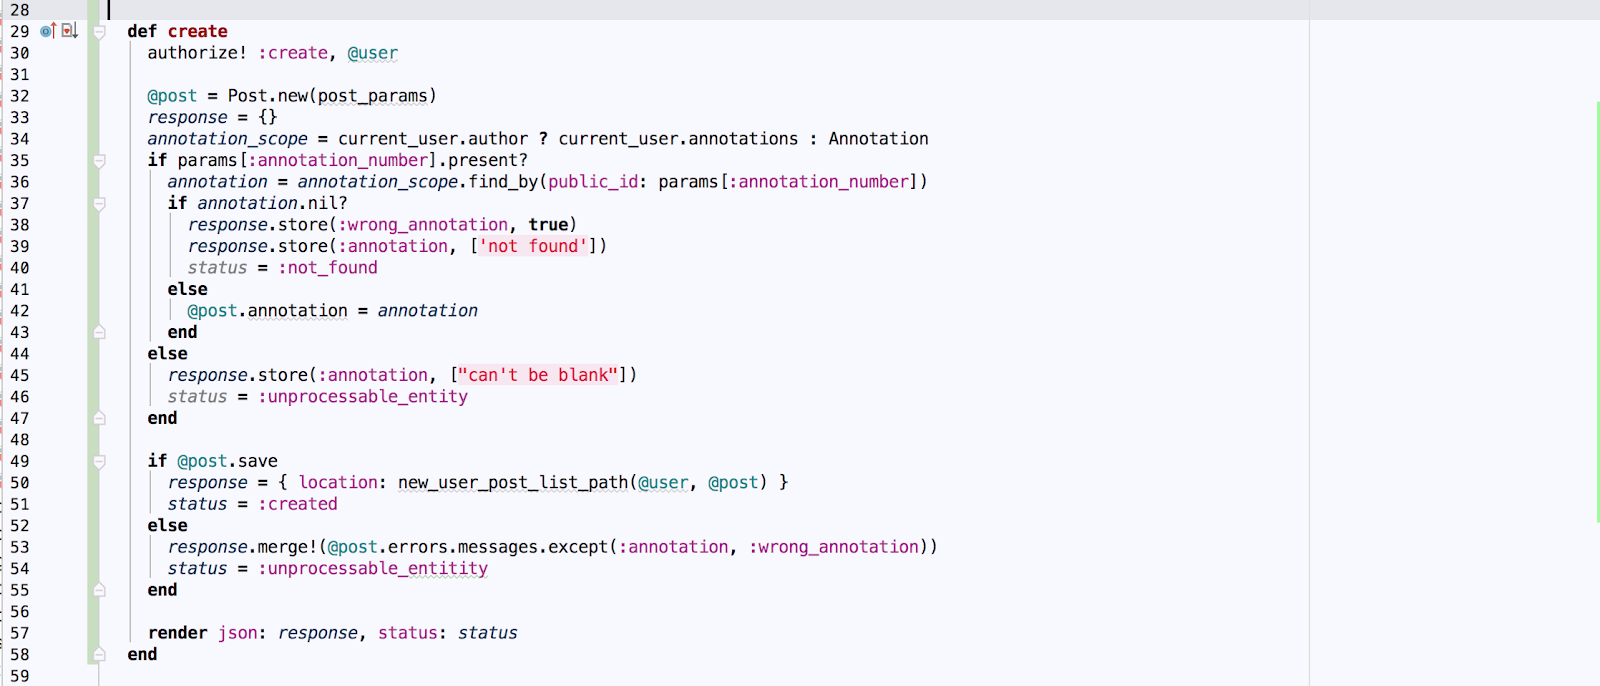
This is a generic example of the controller action, which contains a lot of object changing functionality:

This code can be refactored in a couple of different ways. But there is a way to build an application that prevents huge models and massive actions – using dry-rb.
What is dry-rb
Dry-rb is an ecosystem of gems, which could be plugged in separately to fulfill a specific task or used together to provide a platform for Ruby applications.
You can find an example of how a couple of dry-rb gems could help build healthy architecture below.
Dive In
The prevailing majority of projects have some kind of user creation feature required at a very early stage. After running all needed migrations and building proper model relationships, the next step will be creating the way users are going to be added to the application. Frontend makes a call and hits the controller action.
Controller

As you can notice, this action just passes permitted user_params to some Operations::Users::Create and then handles the result. The controller contains the only application logic, and all the magic happens in Operation.
So what is an Operation? Operation is a service built using dry-transaction and dry-container gems. Let’s dive into the details of Operation service implementation in the next part.
Operation
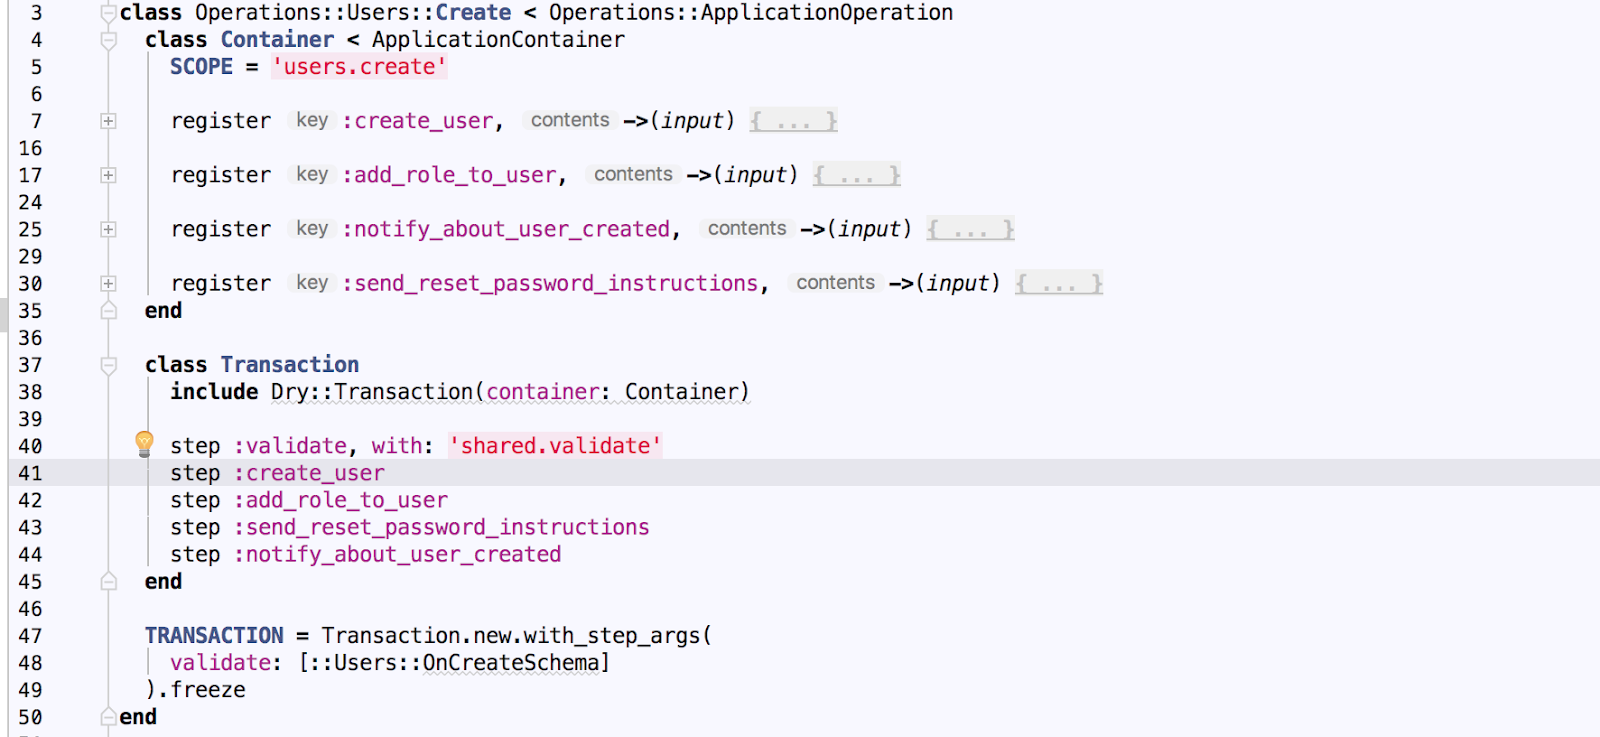
Operation class consists of two parts, encapsulated into their own internal classes.

The first part, called Container, contains declarations (definitions) of operation steps - :create_user, :add_role_to_user, :notify_about_user_created, :send_reset_password_instructions. This part is responsible for the actual logic behind each step.
The second part, called Transaction, defines the steps execution order. The first step on the list is :validate, and it is defined in a shared namespace (shared.validate) - they are intended for reusing common logic across different operations.
Reusing Common Logic

In the screenshot above, you can see the source code for :validate step. The most important part here is the schema invocation. schema is a validation class, which is passed down from the specific Operation where :validate step is used – for instance, from our Operations::User::Create class (line 48 in the previous screenshot).
And I know we’ve already dived into things quite a bit, but we need to go even deeper - to the schema definition.

Validation Schema

Schema is powered by dry-validation gem. Each schema class encapsulates all the validations the data must pass.
For instance, Users::OnCreateSchema checks that params received from the controller contain only 3 keys: email, username, and roles, and that their values are consistent with restrictions provided in block.
If the hash passed to schema.call method conforms to rules defined by the schema, a successful result is returned from the :validate step, and execution is passed down to the operation’s next step.
Let’s unwind our stack a bit and return to other steps in Operations::Users::Create.
Operation Steps

In the next step - :create_user - we can see pretty standard object creation code. Each step should return either Success or Failure result, and the execution is passed down to the next step only in the case of a successful result. Failures return execution back to the caller (in our case, controller) immediately.
Notice how we push the success message to the input hash in :notify_about_user_created step - this specific message will be plucked out of the Success result in the controller.
##Result Handling

In the screenshot above, you can see the source code for the handle_result method (which is called from our controller create action - you can see the call on line 29 in the controller code screenshot above, just scroll up a bit). This method adds a flash notice with a success message or error list – depending on whether the result was successful or not.
Conclusion
This setup is not a silver bullet, and it won’t make all maintainability issues magically disappear. But what it surely can do is provide a robust, testable, and scalable way of handling business logic. You’ll always know where to find code responsible for each and every business transaction that happens in your Rails application – and all without having to scroll through a 1000+ lines long model, skipping all the scopes, associations, and other things typically found in Rails models.